Hi friends, I'm back with an elaborate post describing the whole process of making cake pops at home. I made for my friend's daughter's birthday party. They turned out really yummy and looked super cute in the pics. People should stop cutting cakes and just buy lots of cake pops to celebrate... so much fun to decorate them and no mess while eating them. You just have to pop them into your mouth :)
Cake pops can be made at home with any cake - vanilla or chocolate or literally any cake. If you even have leftover cake or cake crumbles, turn them into these lovlies. I will be explaining the recipe of a chocolate cake i used here for beginners who want to try cakes. If you want to save some time, you can even buy the cake mix boxes. Bake them and use for cake pops.
This post will explain:
1. Wacky chocolate cake recipe
2. Cake pops recipe
3. DIY Colored Sugar sprinkles recipe
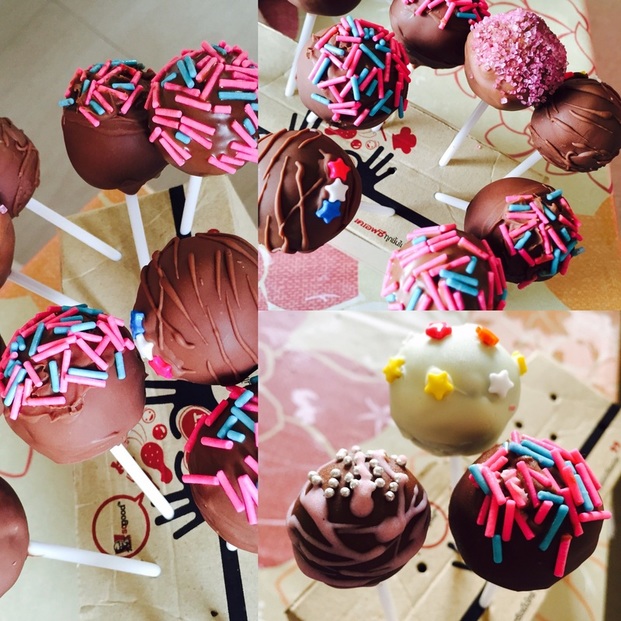
Cake pops made at home
Wacky chocolate cake:
As the name suggests, this is a crazy recipe for a chocolate cake but very simple one bowl method. You can whip this up in no time for your surprise guests.
You need: 1.5 cups flour, 1 cup sugar, 1/4 cup cocoa, 1/2 tsp salt, 1 tsp baking soda - mix all the dry ingredients. Make 3 wells. Add 3/4 tsp vanilla, 1/3 cup oil, 1 tbsp vinegar in each. Pour 1 cup cold water on top of it and mix well. Bake at 350 F for 30-35 mins. I skipped the vinegar and still came out good. (Will update the result when i try again with vinegar)
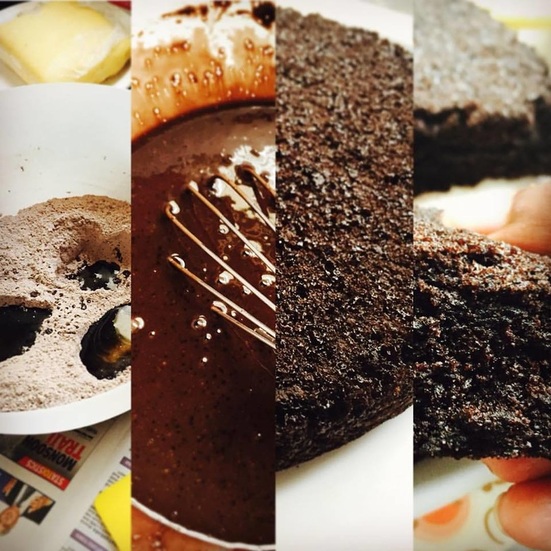
Wacky chocolate cake - 3 well one bowl method
Cake pops 101 - How to make cake pops
You need:
Cake crumbs, Cake pop sticks, Candy melts/ Chocolate
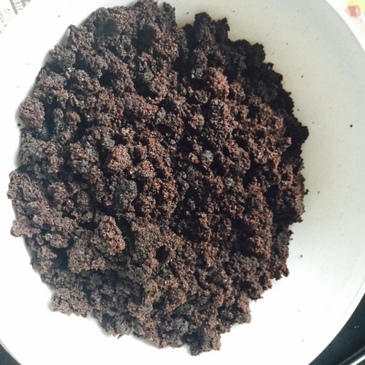
1. Let the cake cool down completely. You need to crumble the cake completely by hand into fine crumbs. You can leave out the sides and top if they have a hard crust.
2. Now divide the crumbles into half. Start with one half of the mixture.
3. Slowly add a tablespoon of plain frosting to one half of the cake crumble. You have many options here for the frosting, which is used to hold the crumbs together and to help make a ball out of it.
A. You can use something like vanilla buttercream
B. Thick Chocolate Ganache
C. Condensed Milk
D. In emergency cases, you can also use the store bought ready made icing like Pillsbury.
You need:
Cake crumbs, Cake pop sticks, Candy melts/ Chocolate
1. Let the cake cool down completely. You need to crumble the cake completely by hand into fine crumbs. You can leave out the sides and top if they have a hard crust.
2. Now divide the crumbles into half. Start with one half of the mixture.
3. Slowly add a tablespoon of plain frosting to one half of the cake crumble. You have many options here for the frosting, which is used to hold the crumbs together and to help make a ball out of it.
A. You can use something like vanilla buttercream
B. Thick Chocolate Ganache
C. Condensed Milk
D. In emergency cases, you can also use the store bought ready made icing like Pillsbury.
 Cake crumbs | 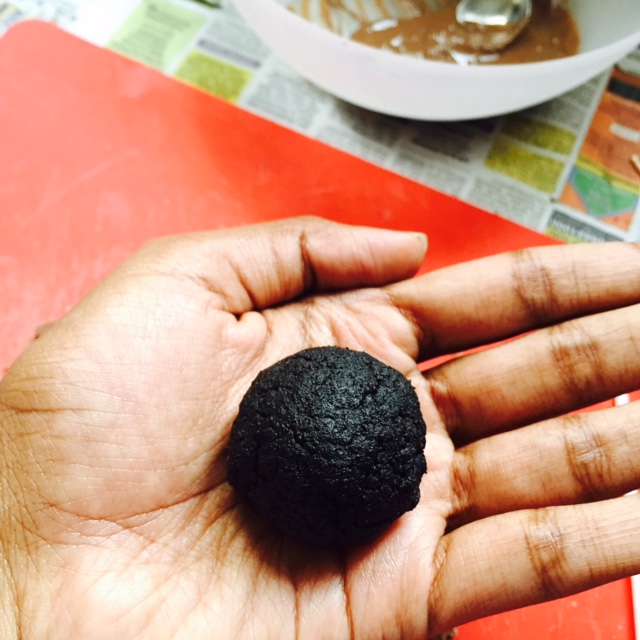 Form cake balls for making cake pops |
4. Keep adding the frosting little by little, until the mixture comes together (But not more than 1/4 cup). You will know it when you hold the mixture tight in your hand and release, they retain shape.
5. Start rolling the mix into balls in between your palms. You can measure the mix each time to get same sized balls. Try to make them smaller, about 1 - 1 1/2 tbsp size or a small gooseberry size. Dipping them in chocolate and decorations will make them even bigger and heavy for the stick.
The ball size in the picture below was too big to hold on the stick, so i had to roll them back to half of its size. Double work! Phew!
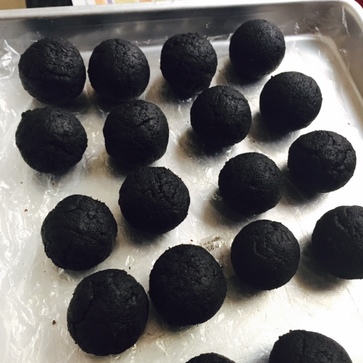
6. Arrange them on a parchment paper and refrigerate for 30 mins, so that they retain the shape and become hard.
7. Meanwhile melt some chocolate in a double boiler or microwave. Let it cool for a few seconds.
8. Dip the cake pop sticks into melted chocolate and insert it into the cake balls gently halfway through, without much pressure and not breaking them apart. The melted chocolate will act as gum and holds the cake ball on to the stick
5. Start rolling the mix into balls in between your palms. You can measure the mix each time to get same sized balls. Try to make them smaller, about 1 - 1 1/2 tbsp size or a small gooseberry size. Dipping them in chocolate and decorations will make them even bigger and heavy for the stick.
The ball size in the picture below was too big to hold on the stick, so i had to roll them back to half of its size. Double work! Phew!
6. Arrange them on a parchment paper and refrigerate for 30 mins, so that they retain the shape and become hard.
7. Meanwhile melt some chocolate in a double boiler or microwave. Let it cool for a few seconds.
8. Dip the cake pop sticks into melted chocolate and insert it into the cake balls gently halfway through, without much pressure and not breaking them apart. The melted chocolate will act as gum and holds the cake ball on to the stick
 Cake balls refrigerated | 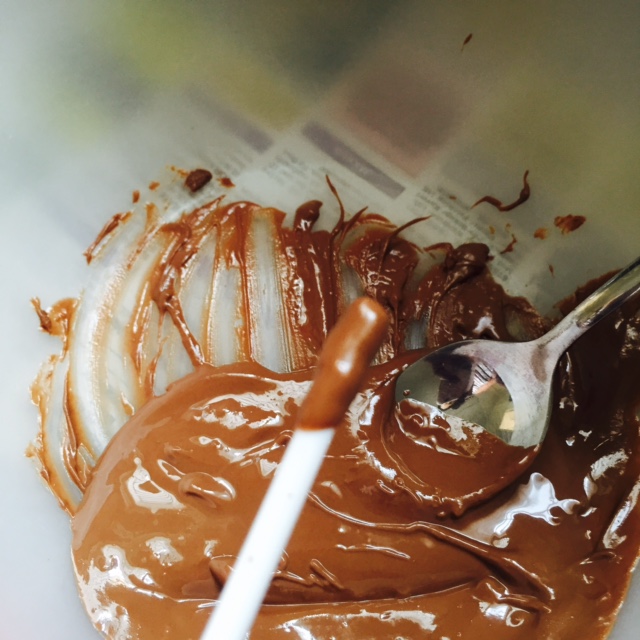 Cake pop sticks dipped in melted chocolate | 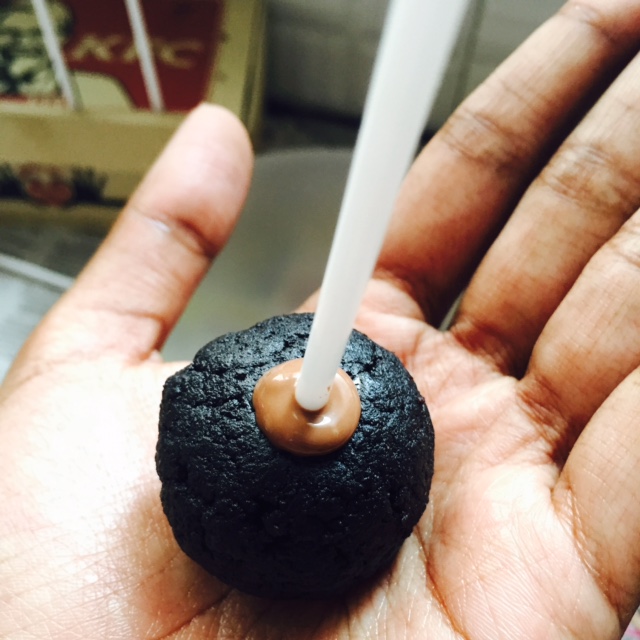 Cake pop stick inserted into cake balls |
Don't panic if the cake ball breaks on you, apply some pressure and roll them again into balls. Nothing is impossible.
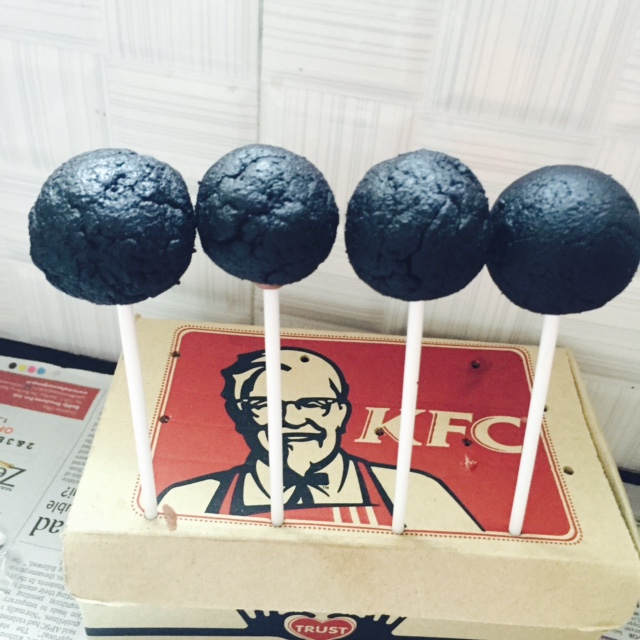
9. Place the cake pops, ball side down on a sheet if you are going to serve them like that. Else use a cake pop stand or a DIY stand like mine to hold the pops straight upright. Again keep them in the refrigerator for 20 mins for the chocolate to solidify and become firm.
10. Meanwhile melt the candy melts or chocolate for the dip in a double boiler or microwave. I tried both white and milk chocolate. White chocolate is a little difficult to work with, but can do. Add oil if required to thin out the chocolate. Bring the temperature of the chocolate to room temp. And place the cake pops outside and bring to room temp. This is an important trick, and if you do it right you get a smooth coating. If not, the coating cracks after some time.
11. Pour the chocolate in a tall glass. Dip the cake pop into it and slightly swirl to cover all sides. Tap the stick gently to drip the excess chocolate. My chocolate was too thick on its own, so i could not dip the cake pop into it. The pop would fall off the stick into the chocolate. so i took a spoon and poured the chocolate on top of the pops carefully and it was a easier method for me. You will find your own successful method, trust me!
12. You can decorate them with sprinkles, sanding sugar, chocolate chips, white chocolate.. there are million ways you can decorate them when the chocolate is still wet. Take inspirations from the internet. You can make your colored sanding sugar as per my recipe below.
13. Again place them in a stand and refrigerate them until you need to serve them.
 Cake pops before decorating | 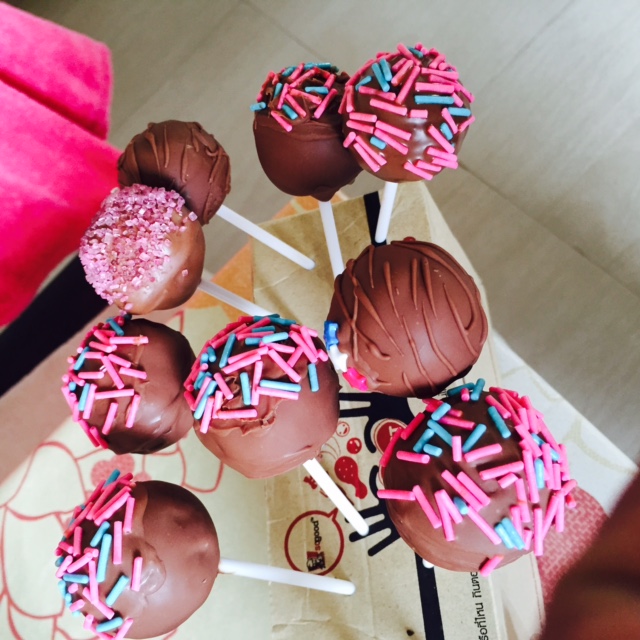 Cake pops after decoration |
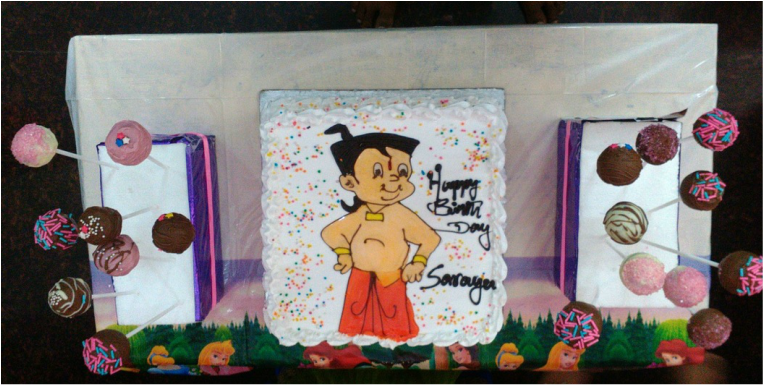
This was how my cake pops were served at a birthday party.
Cake pops can stay fresh for even a week in the refrigerator. You can also keep them out for a day, provided its not too hot to melt them down.
Cake pops can stay fresh for even a week in the refrigerator. You can also keep them out for a day, provided its not too hot to melt them down.
Colored Sanding Sugar Recipe
It is very easy to make your own colored sanding sugar at home. You can use this sugar to decorate various desserts, cakes, cake pops and there is so much you can do.
You need:
Granulated sugar (Very fine small granules)
Edible Food Gel color (Americolor)
A ziplock bag
Method:
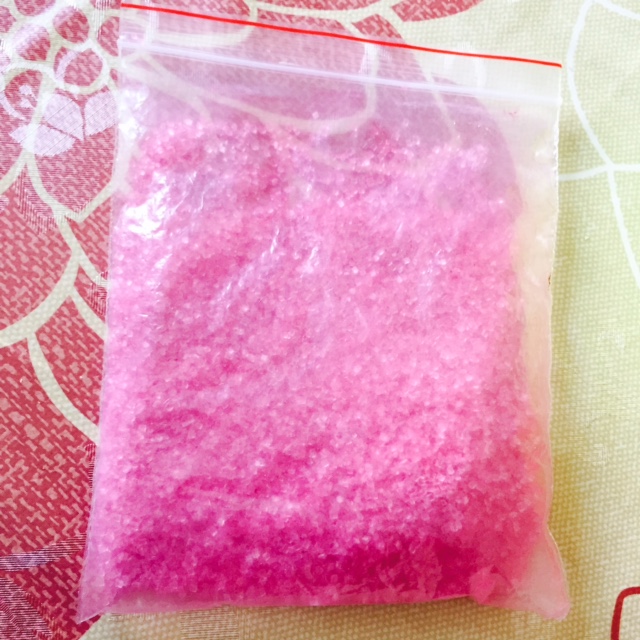
Place the sugar in a zip lock bag. add a drop of gel food color as desired. Close the zip lock.
Shake and press the sugar with your hand so that the color is well distributed. Keep massaging the bag until the sugar is evenly colored. Add more color for the required shade.
Then open the bag, spread the sugar out on a tray and let it get dry for sometime.
It should be ready to use now, to sprinkle on top of your cake pops.
You can store the sugar for late use.
It is very easy to make your own colored sanding sugar at home. You can use this sugar to decorate various desserts, cakes, cake pops and there is so much you can do.
You need:
Granulated sugar (Very fine small granules)
Edible Food Gel color (Americolor)
A ziplock bag
Method:
Place the sugar in a zip lock bag. add a drop of gel food color as desired. Close the zip lock.
Shake and press the sugar with your hand so that the color is well distributed. Keep massaging the bag until the sugar is evenly colored. Add more color for the required shade.
Then open the bag, spread the sugar out on a tray and let it get dry for sometime.
It should be ready to use now, to sprinkle on top of your cake pops.
You can store the sugar for late use.
 Colored sanding sugar | 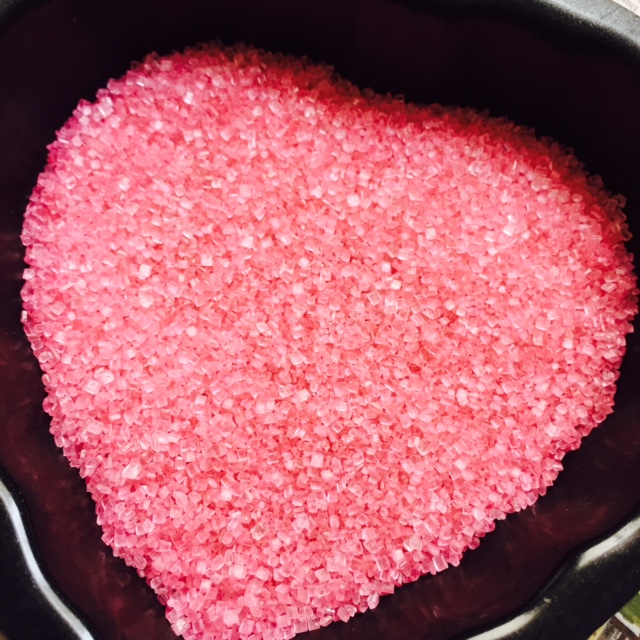 DIY Colored sanding sugar sprinkles |
Hope you liked my elaborate recipe for cake pops. Do try at home and let me know how it turned out.
*You can also avoid Oil in the cake recipe for making cake pops.
* Lesser the oil and lesser the frosting - easier to make cake pops
*You can also avoid Oil in the cake recipe for making cake pops.
* Lesser the oil and lesser the frosting - easier to make cake pops


 RSS Feed
