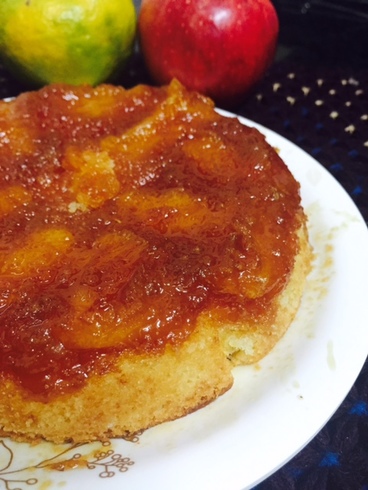
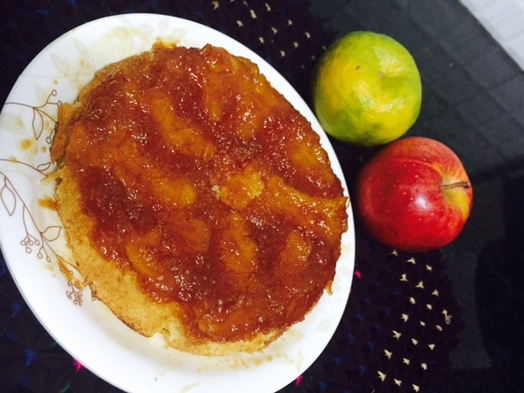
Caramel Orange Upside Down Cake
Beautiful flavors in one cake and just amazing! Do you love Caramel oozing on your cake? Do you love bursting citrus flavor? Nuttiness? Yes, then this is the one cake you must try without reasons. It is pretty easy and worth the time baking it, for that beautiful golden hues that you can admire all day.
Below recipe uses eggs, but I tried eggless version by replacing the egg with a 1/4 cup of hung curd. You can make the same cake with pineapples too and double the recipe for a 9" cake. This time I've tried to capture the recipe in pictures with butter and flour all over my phone. (Wonder how people take flawless pictures while cooking and hands dirty)
This has a pudding texture, soaking up all the citrus and caramel syrup. Goes well with a dollop of whipped cream or a scoop of Vanilla ice cream on top or just plain old cake.
Caramel Orange Upside Down Cake
Serves: 4
Preparation Time: 30 mins
Baking time: 25 mins at 180*C
Ingredients:
Caramel:
Granulated White Sugar - 1/3 cup + 1 tbsp
Water - 40 ml
Salt - 1/4 tsp
Butter - 1/2 tbsp
Oranges - 2
Cake:
Unsalted butter - 58 gms
Granulated white sugar - 1/3 cup
Egg - 1 (I used 1/4 cup of hung curd)
Zest of Orange - 1/2 tbsp
All purpose flour - 70 gms (1/2 cup + 1/8 cup)
Almond Meal - 1/4 cup (Blanch almonds, dry them, and powder)
Baking powder - 3/8 tsp (6 gm)
Baking soda - 3/8 tsp (6 gm)
Salt - 1/8 tsp
Milk - 1/4 cup
Method:
1. Butter your 6" pan and place parchment paper below and a long strip to cover the sides too, so that the cake comes out easily and you just have to peel out the paper.
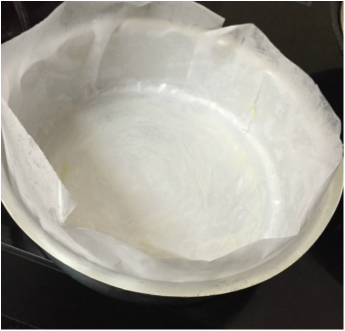
Pan greased and lined with parchment paper
2. Add the sugar, salt and water in a pan and bring it to boil on a medium flame. Let the sugar syrup boil, keep swirling the pan without stirring.
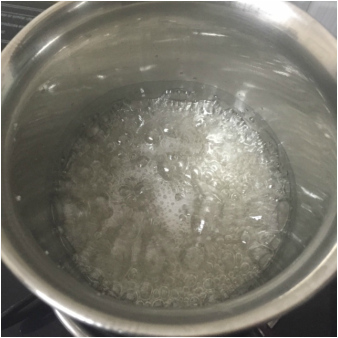
Sugar syrup boiling
3. When it starts changing color, keep on a low flame and keep swirling the pan until it changes to amber color. Switch off and do not leave it to smoke. Add the butter to it immediately and swirl it until the butter dissolves. Be quick and careful with the caramel. It will be piping hot, that it can burn you very badly. Just pour the caramel syrup into the lined pan quickly before it sets. Swirl the cake pan to cover the base completely. Dont worry if the syrup is thick and doesnt cover the bottom completely. Stick it into the oven for 5 mins at 180*C, it will melt down and you can swirl it around.
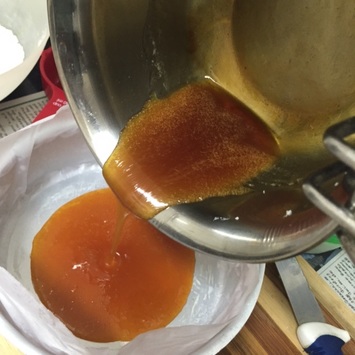 Caramel poured into the pan |  Caramel set at the bottom of the pan |
4. Peel the oranges along with the white pith otherwise its going to be bitter. Remove the seeds and separate into wedges. Place them on the caramel arranging them in circles.
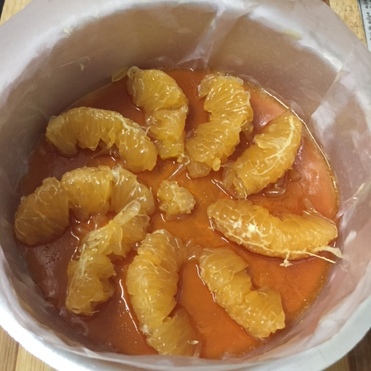 Arrange the oranges on the caramel | 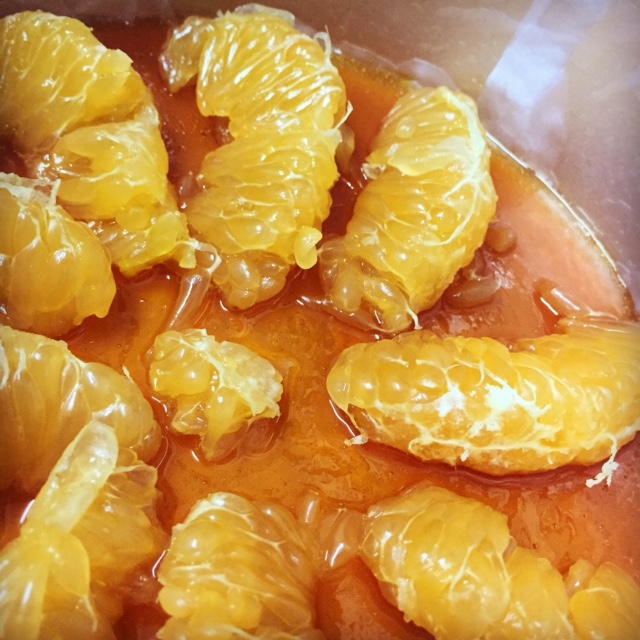 Golden hues of Oranges and Caramel |
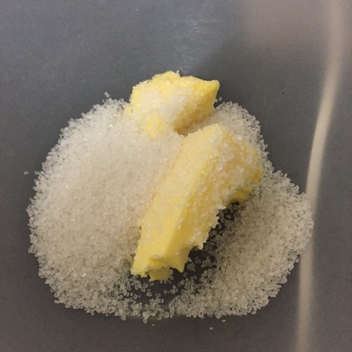
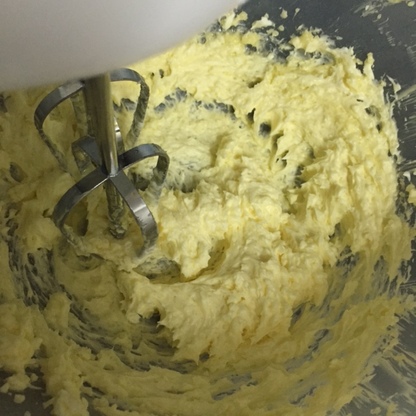
5. Add the flour, almond meal, baking powder, baking soda and salt in a bowl. Whisk them together and keep aside. On the other side, add in the butter and sugar. Beat it with hand beater/stand mixer until creamy and fluffy. Takes about 5 mins.
 Cream the Butter and Sugar |  Creaming stage |
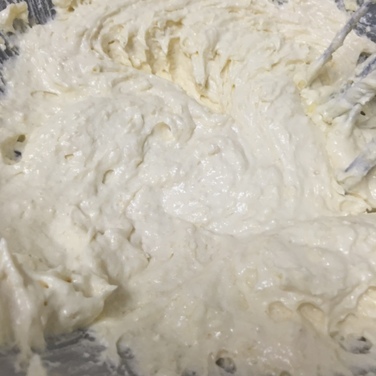
6. Add the egg now (Or hung curd) and mix until well combined. Add the zest of orange now and mix.
Pale, fluffy and creamy
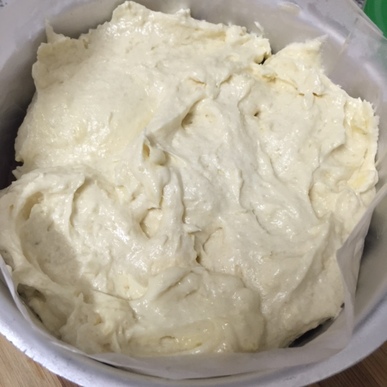
7. Add one third of the flour and beat on low speed, and beat at slow speed until just combined. Add in half of the milk. Beat again. Repeat with flour, remaining milk and the flour again. Start and end with flour always. Beat only until combined. Do not over beat at this stage. The batter will be thick and fluffy as in the picture below.
Cake batter
8. Pour the batter into the set caramel pan. If its very thick, scoop out covering the pan without adding pressure or the pattern of oranges may get distorted. Then level with a spoon or offset spatula gently to cover the pan, leaving no gaps or air pockets inside. Tap the pan on the counter a few times.
 Pour the batter into the pan | 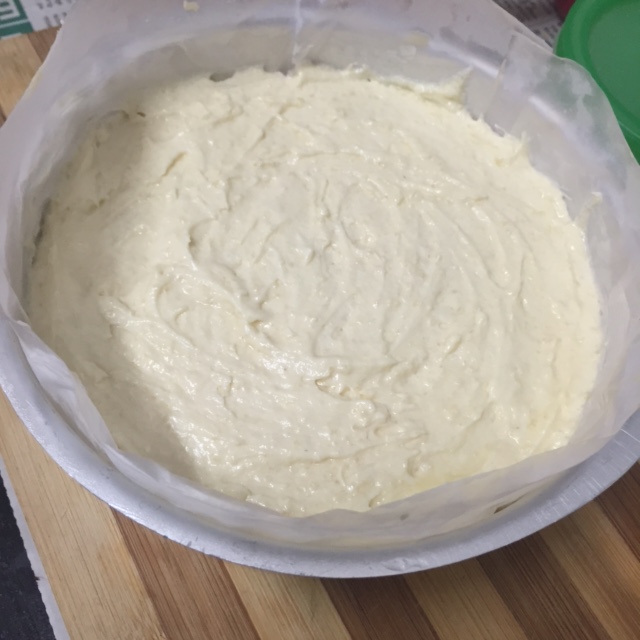 Tap the pan on the counter |
9. Bake in a pre-heated oven at 180*C for 25 minutes or until a toothpick inserted in the center comes out clean. Check at 20 mins, depending on your oven. Let cool on a wire rack for 5-10 mins. While it is still warm, you need to invert the cake onto a plate/cake board when it is still warm, else the caramel will remain stuck on the pan. Peel off the paper on all sides and serve after it is completely cooled down.
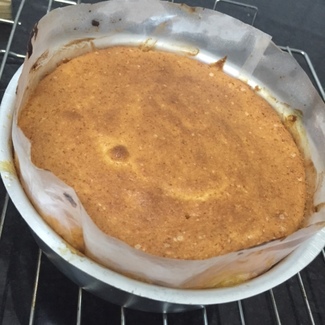 Baked Cake |  Upside down cake |
*If the top gets darker before the cake bakes, cover the top with a foil and continue baking.
*If the oranges are juicy, the cake when turned upside down will be a little runny but still tasty
*If the oranges are juicy, the cake when turned upside down will be a little runny but still tasty
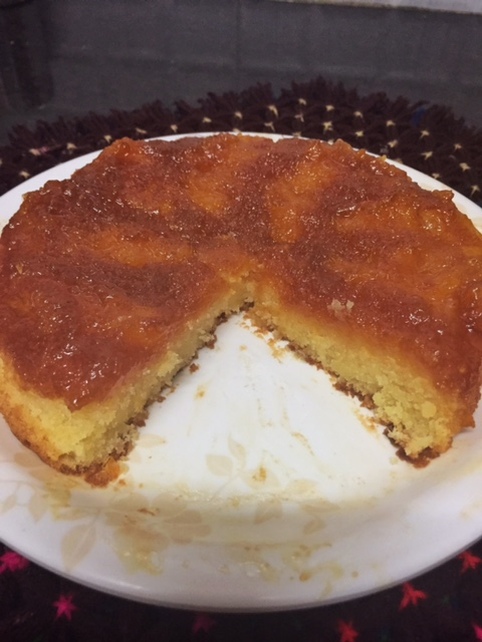
Slice of an orange upside down cake
Do try the eggless or with eggs.. Pineapple or Oranges or even Bananas! Let me know how it turned out.
Would love to see the beautiful pictures of your cake.
Post your questions if any. I will try my best to find answers for you.
That's it folks, Happy Baking :)
Would love to see the beautiful pictures of your cake.
Post your questions if any. I will try my best to find answers for you.
That's it folks, Happy Baking :)


 RSS Feed
